MMDETECTION 目标检测
MMDETECTION 目标检测
安装
conda activate open-mmlab

conda install pytorch==1.6.0 torchvision==0.7.0 cudatoolkit==10.1 -c pytorch -y

# install the latest mmcv
pip install mmcv-full==latest+torch1.6.0+cu101 -f https://download.openmmlab.com/mmcv/dist/index.html

# install mmdetection
git clone https://github.com/open-mmlab/mmdetection.git
cd mmdetection
pip install -r requirements/build.txt
pip install -v -e .
torch download url:
https://download.pytorch.org/whl/torch_stable.html
目标检测数据集
coco
格式字段信息:info, licenses, images, annotations,categories。上面3种标注类型共享的字段信息有:info、image、license。不共享的是annotation和category这两种字段,他们在不同类型的JSON文件中是不一样的
{
    "info": info,
    "licenses": [license],
    "images": [image],
    "annotations": [annotation],
    "categories": [category]
}

image{
    "id": int,# 图片的ID编号(每张图片ID是唯一的)
    "width": int,#宽
    "height": int,#高
    "file_name": str,# 图片名
    "license": int,
    "flickr_url": str,# flickr网路地址
    "coco_url": str,# 网路地址路径
    "date_captured": datetime # 数据获取日期
}
annotation{
    "id": int, # 对象ID,因为每一个图像有不止一个对象,所以要对每一个对象编号(每个对象的ID是唯一的)
    "image_id": int,# 对应的图片ID(与images中的ID对应)
    "category_id": int,# 类别ID(与categories中的ID对应)
    "segmentation": RLE or [polygon],# 对象的边界点(边界多边形,此时iscrowd=0)。
    #segmentation格式取决于这个实例是一个单个的对象(即iscrowd=0,将使用polygons格式)还是一组对象(即iscrowd=1,将使用RLE格式)
    "area": float,# 区域面积
    "bbox": [x,y,width,height], # 定位边框 [x,y,w,h]
    "iscrowd": 0 or 1
    # RLE:Run Length Encoding(行程长度压缩算法)
    # iscrowd=0那么segmentation就是polygon格式;只要iscrowd=1那么segmentation就是RLE格式
}
categories{
	"supercategory": str,# 主类别
    "id": int,# 类对应的id (0 默认为背景)
    "name": str # 子类别
}
- example
'images': [
    {
        'file_name': 'COCO_val2014_000000001268.jpg',
        'height': 427,
        'width': 640,
        'id': 1268
    },
    ...
],

'annotations': [
    {
        'segmentation': [[192.81,
            247.09,
            ...
            219.03,
            249.06]],  # if you have mask labels
        'area': 1035.749,
        'iscrowd': 0,
        'image_id': 1268,
        'bbox': [192.81, 224.8, 74.73, 33.43],
        'category_id': 16,
        'id': 42986
    },
    ...
],

'categories': [
    {'id': 0, 'name': 'car'},
 ]
PASCAL VOC
PASCAL VOC挑战赛 (The PASCAL Visual Object Classes )是一个世界级的计算机视觉挑战赛, PASCAL全称:Pattern Analysis, Statical Modeling and Computational Learning,是一个由欧盟资助的网络组织。
格式如下,一个图片一个xml文件。
<annotation>
	<folder>VOC2012</folder>  #表明图片来源
	<filename>2007_000027.jpg</filename> #图片名称
	<source>                  #图片来源相关信息
		<database>The VOC2007 Database</database>
		<annotation>PASCAL VOC2007</annotation>
		<image>flickr</image>
	</source>
	<size>     #图像尺寸
		<width>486</width>
		<height>500</height>
		<depth>3</depth>
	</size>
	<segmented>0</segmented> #是否用于分割
	<object>  #包含的物体
		<name>person</name> #物体类别
		<pose>Unspecified</pose>
		<truncated>0</truncated>
		<difficult>0</difficult>
		<bndbox>  #物体的bbox
			<xmin>174</xmin>
			<ymin>101</ymin>
			<xmax>349</xmax>
			<ymax>351</ymax>
		</bndbox>
		<part> #物体的头
			<name>head</name>
			<bndbox>
				<xmin>169</xmin>
				<ymin>104</ymin>
				<xmax>209</xmax>
				<ymax>146</ymax>
			</bndbox>
		</part>
		<part>   #物体的手
			<name>hand</name>
			<bndbox>
				<xmin>278</xmin>
				<ymin>210</ymin>
				<xmax>297</xmax>
				<ymax>233</ymax>
			</bndbox>
		</part>
		<part>
			<name>foot</name>
			<bndbox>
				<xmin>273</xmin>
				<ymin>333</ymin>
				<xmax>297</xmax>
				<ymax>354</ymax>
			</bndbox>
		</part>
		<part>
			<name>foot</name>
			<bndbox>
				<xmin>319</xmin>
				<ymin>307</ymin>
				<xmax>340</xmax>
				<ymax>326</ymax>
			</bndbox>
		</part>
	</object>
</annotation>
WIDER FACE
人脸检测的数据集,格式如下:
0--Parade/0_Parade_marchingband_1_117.jpg
9
69 359 50 36 1 0 0 0 0 1
227 382 56 43 1 0 1 0 0 1
296 305 44 26 1 0 0 0 0 1
353 280 40 36 2 0 0 0 2 1
885 377 63 41 1 0 0 0 0 1
819 391 34 43 2 0 0 0 1 0
727 342 37 31 2 0 0 0 0 1
598 246 33 29 2 0 0 0 0 1
740 308 45 33 1 0 0 0 2 1
Attached the mappings between attribute names and label values.

blur:
  clear->0
  normal blur->1
  heavy blur->2

expression:
  typical expression->0
  exaggerate expression->1

illumination:
  normal illumination->0
  extreme illumination->1

occlusion:
  no occlusion->0
  partial occlusion->1
  heavy occlusion->2

pose:
  typical pose->0
  atypical pose->1

invalid:
  false->0(valid image)
  true->1(invalid image)

The format of txt ground truth.
File name
Number of bounding box
x1, y1, w, h, blur, expression, illumination, invalid, occlusion, pose
Cityscapes
Cityscapes拥有5000张在城市环境中驾驶场景的图像(2975train,500 val,1525test)。它具有19个类别的密集像素标注(97%coverage),其中8个具有实例级分割。Cityscapes数据集,即城市景观数据集,这是一个新的大规模数据集,其中包含一组不同的立体视频序列,记录在50个不同城市的街道场景。
城市景观数据集中于对城市街道场景的语义理解图片数据集,该大型数据集包含来自50个不同城市的街道场景中记录的多种立体视频序列,除了20000个弱注释帧以外,还包含5000帧高质量像素级注释。因此,数据集的数量级要比以前的数据集大的多。Cityscapes数据集共有fine和coarse两套评测标准,前者提供5000张精细标注的图像,后者提供5000张精细标注外加20000张粗糙标注的图像。
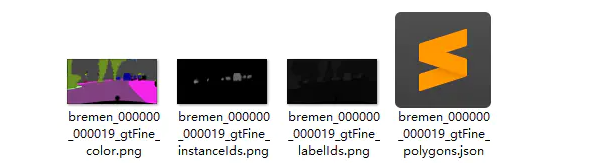
Cityscapes数据集包含2975张图片。包含了街景图片和对应的标签。大小为113MB。Cityscapes数据集,包含戴姆勒在内的三家德国单位联合提供,包含50多个城市的立体视觉数据。
单个样本 4 个数据:[color, instanceIds, labelIds, polygons]
训练
1:训练之前需要改动的地方针对coco数据集的: 1、定义数据种类,需要修改的地方在mmdetection/mmdet/datasets/coco.py。把CLASSES的那个tuple改为自己数据集对应的种类tuple即可。例如: CLASSES = ('speedboat', 'boat', 'Clamp', 'Drainage_Plate')
2、接着在mmdetection/mmdet/core/evaluation/class_names.py修改coco_classes数据集类别,这个关系到后面test的时候结果图中显示的类别名称。 def coco_classes(): return [ 'Glass_Insulator', 'Composite_Insulator', 'Clamp', 'Drainage_Plate' ] 3、修改configs/faster_rcnn_r50_fpn_1x.py中的model字典中的num_classes、data字典中的img_scale和optimizer中的lr(学习率)。例如:
num_classes=5,#类别数+1 img_scale=(640,478), #输入图像尺寸的最大边与最小边(train、val、test这三处都要修改) optimizer = dict(type='SGD', lr=0.0025, momentum=0.9, weight_decay=0.0001) #当gpu数量为8时,lr=0.02;当gpu数量为4时,lr=0.01;我只要一个gpu,所以设置lr=0.0025 4、在mmdetection的目录下新建work_dirs文件夹
训练的指令:
python tools/train.py configs/faster_rcnn_r50_fpn_1x.py --gpus 1 --validate --work_dir work_dirs
python -u ./tools/train.py ./configs/retinanet/retinanet_r50_fpn_1x_voc_butterfly.py --gpu-ids 1
python -u image_demo1.py ../../dataset/butterfly/TestData/IMG_000100.jpg ../configs/retinanet/retinanet_r50_fpn_1x_coco.py ../work_dirs/retinanet_r50_fpn_1x_voc_butterfly/latest.pth --device cuda:2
coco api
git clone https://github.com/pdollar/coco.git
pip install cython
cd PythonAPI/
make
python3.6 setup.py install --user